
Discover
Things that I learned about using construction lines as a lettering technique was that it was essential for my final design. I was guided under construction lines and lettering technique, it was showing me how to draw the letters along with giving me creative freedom to draw unique letters. Now when drawing, using circle guides were perfect to get the proper shape of serifs. Using circles gave the serifs of the letter the right shape and base. The requirements needed for my letter to become a wood inlay was that it required use of proper technique, involve creative design, save solder, and to not exceed 8 inches in either dimension.
Define
Once my letter design was ready, it was time to begin making my inlay into the wood. The tools needed to help satisfy the requirements for the wood inlay included the soldering iron, wood burning pen, paint brush, air intake, trim router, orbital sanders, paint.
Design


Things that worked well about each design was that it was simple enough and symmetrical on both sides. Based on this, the design that was most likely to be successful was design number 1 as the serifs of the letter were subtly curved and easy to solder onto the wood.
Develop
Safety hazards involved in the making of our wood inlays involved burning and dismembering ourselves. The safety precautions we used were masks and goggles in order to protect ourselves from any possible debris. We had to be careful and precise with our tools in order to prevent injuries. Overall I had no design problems when starting my wood inlay.
Deliver
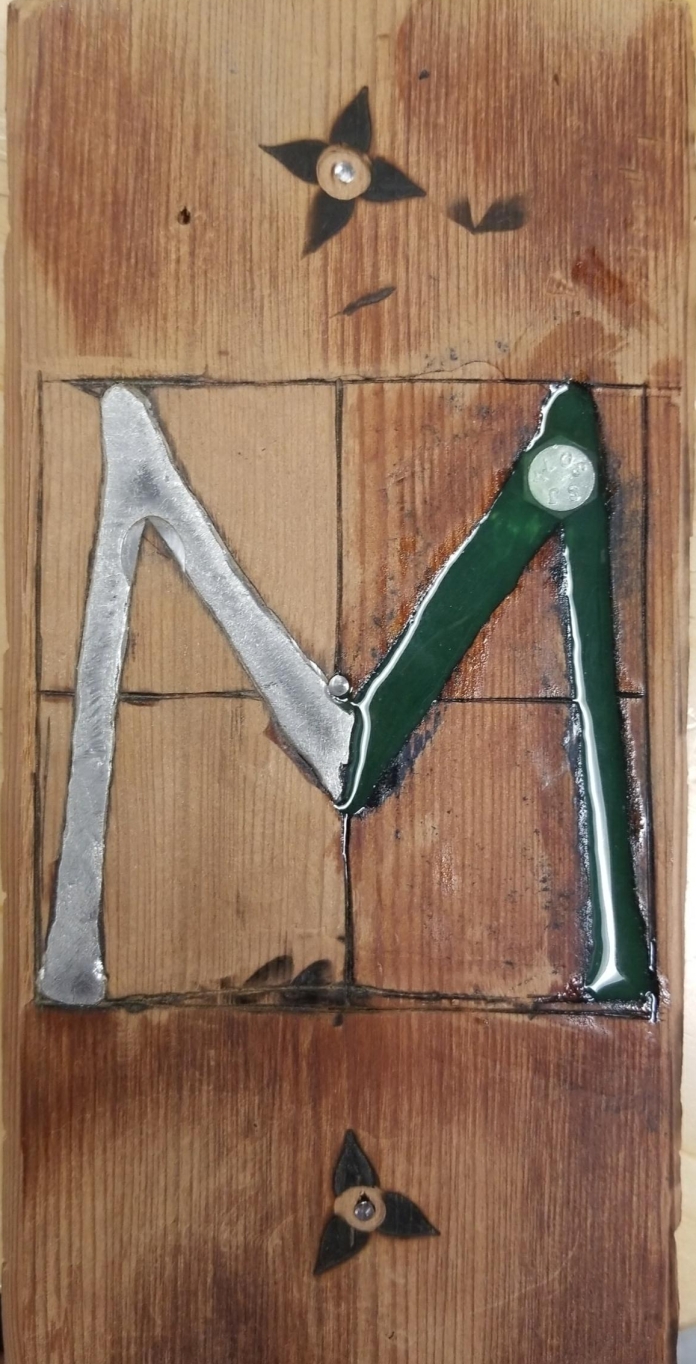
In conclusion, my design was unique, it was within 8 inches, proper technique was used, and I did my best not to waste any solder. It reached all of the requirements previously listed.
